Hey Everyone!
Well it's finally starting to feel like summer! Woo! Bring on the heat!
As a gal on the Specific Carb Diet, pasta is something that I will always long for. I find myself craving pesto, or a good tomato sauce. Well friends, this dish took me there! It HIT THE SPOT!!
With zucchini noodles, you get that slupry texture, carb-y bulk, and aesthetic appearance of noodles! It's a ten in my book!
So what did I make, exactly? SCD Eggplant "Non-Parmesan!"
It's gluten free, SCD, Paleo and Vegan w/ a BED option!
Here's what you need: (serves 1)
1/2 red pepper (SCD use 1 roasted red pepper)
1 medium carrot
1/4 onion
1 garlic clove
1/2 cup grape tomatoes - about 15 (or 2 roma tomatoes) (BED omit - use whole red pepper instead)
splash of white wine (about 3 Tbsp) (BED sub veg stock)
1/4 tsp dried oregano
1/8 tsp dried basil
salt and pepper
3 slices eggplant, 1/4 inch thick
1/2 - 3/4 cup almond flour
salt and pepper and pinch oregano
1 egg white, beaten (Vegan option: plain almond milk)
1 zucchini, "noodlized"
4 olives, sliced
fresh basil, chopped
Preheat oven to 400 degrees. Slice 1/4 inch rounds of your eggplant. Place your egg white, or almond milk, in a bowl. Place almond flour and seasoning in another bowl. Dip your eggplant slice in the egg white, and then coat it in the almond flour. Place on a tin-foil-lined, olive-oil-sprayed baking sheet. Spritz the slices with olive oil and then bake for 30 minutes, flipping once, halfway through.
When you flip the eggplant, add your "noodlized" zucchini to the tray, and bake it for the final 15 minutes, stirring once, halfway through.
Meanwhile, saute your carrots and onion in 1 tsp EVOO, salt, pepper, and spices. Let it soften for about 4 minutes. Then, add your peppers. Let those soften for about 3 minutes. Then, add your garlic and tomatoes. Let those cook for about 3 minutes. Then, deglaze with the white wine. Let it cook for about 2 minutes. Transfer to your food processor, and blitz until smooth.
Toss your "zoodles" with the sauce, top with the eggplant rounds, and garnish with the black olives.
Wow. Where to begin on this one?! First of all, this sauce was TERRIFIC. It's so simple, but it's just bursting flavor! It's made with all fresh, whole, ingredients. It literally tastes like a stroll through the garden! And the olives give it a wonderfully salty punch. Just fabulous.
And the "zoodles" are slurpy and chewy! And by baking them briefly, they become pliable and warm. It's definitely not the stereotypical "raw" meal. I've been to raw restaurants, and I'm always disappointed because the meal's always cold!! I always think, "this would taste so good if they just nuked it for about 30 seconds!" haha...I know that defeats the "raw" purpose, but I'm old fashioned: I like a warm plate of spaghetti.
And the eggplant....SO GOOD!! The almond coating gives it this nutty richness. The outside is crisp, and then you get to the chewy, and earthy eggplant center. I may have re-fallen in love with eggplant again:)
What a delightful meal. I hope you all are having a wonderful week!
Need a spiralizer or food processor? Here are the ones I use and love!
Showing posts with label olives. Show all posts
Showing posts with label olives. Show all posts
Wednesday, May 29, 2013
SCD Eggplant "Non-Parmesan!" GF, V, SCD & Paleo w/ BED option!
Labels:
basil,
Body Ecology Diet,
carrots,
eggplant,
gluten free,
grain free,
olives,
pasta,
red pepper,
SCD,
specific carb diet,
Specific Carbohydrate Diet,
tomatoes,
vegan,
zucchini
Tuesday, January 1, 2013
GF Cauliflower Pizza Crust & Homemade Mustard!
I’ll tell you what…there’s nothing quite like getting together with old friends. It’s so wonderful — you pick up right where you left off. Each person is slightly different — older, more mature — but comfortingly, exactly the same. They know you better than anyone, and love you just the same:)
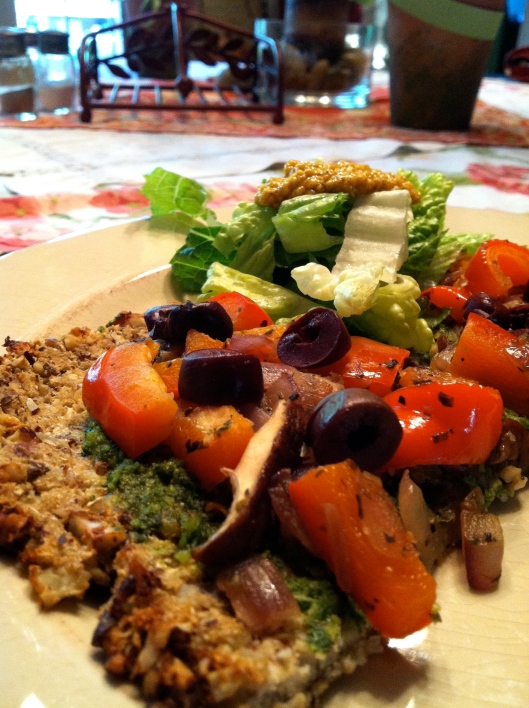
Tonight’s dinner was a bit like that — slightly different, but the same. I’m talking about my Body Ecology Friendly Pizza. It was comforting pizza — but different. How? The crust.
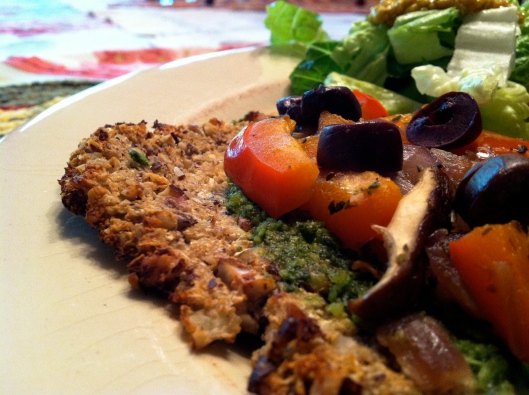
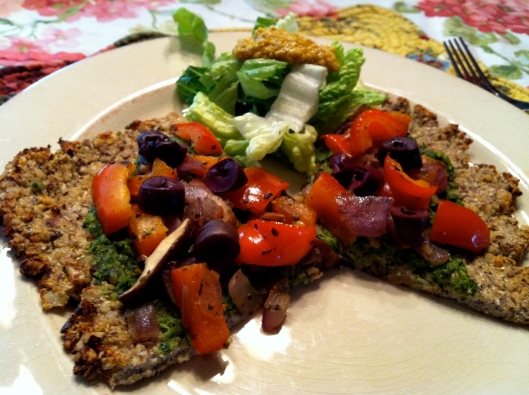
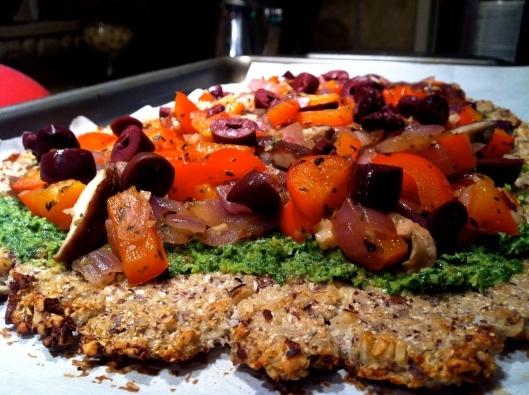
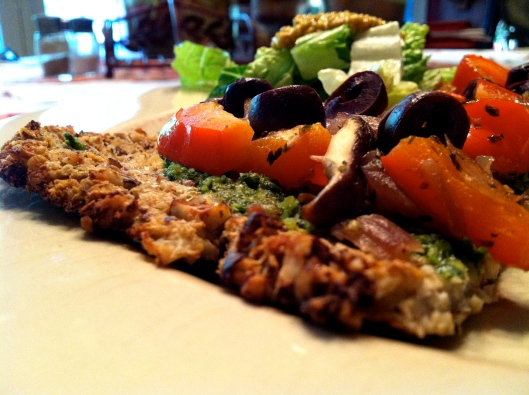
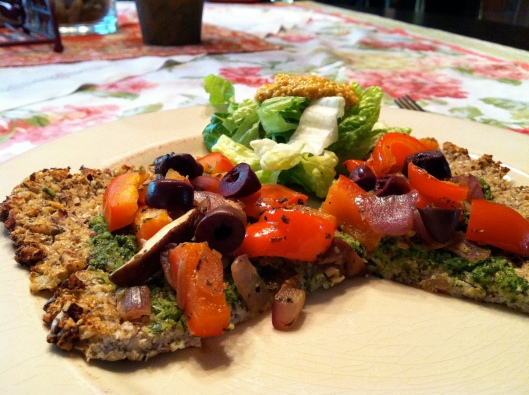
The crust of this pizza was made out of Cauliflower and Ground Hazelnuts! Yes, you heard that correctly — Cauliflower is back with a vengeance! So far, we’ve roasted it as steaks, andmashed it like potatoes. But this time, it debuted as a crust! A wonderful, crispy-edged, gluten, grain, and dairy free crust!
Here’s what you need for the crust:
1 head of cauliflower, processed to a crumb
1 cup + hazelnuts, ground into flour
1/4 onion, chopped
3 garlic cloves, chopped
2 Tbsp quinoa flakes
3 egg whites
salt and pepper
1 cup + hazelnuts, ground into flour
1/4 onion, chopped
3 garlic cloves, chopped
2 Tbsp quinoa flakes
3 egg whites
salt and pepper
Preheat your oven to 450. In your food processor, process your cauliflower, onion and garlic into a crumb — don’t let it become a paste! You will need to do this in batches. Put the processed cauliflower into a large bowl. Add in your egg whites and stir to combine. Then add in your hazelnut flour and quinoa flakes. Line 2 baking sheets with parchment paper and divide your batter into 2 pies. Spread it with a silicone spatula as thin as you can get it! Bake for about 25-35 minutes, until the edges brown.
Top the pizza with your favorite toppings!
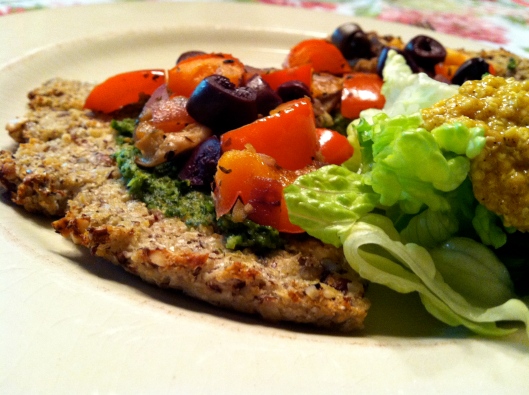
I topped mine with pesto and sautéed onions, garlic, red peppers, shiitake mushrooms, and olives! It was delicious!
Here’s the pesto recipe:
1 cup fresh basil
1/2 cup toasted pine nuts
2 garlic cloves
juice of half a lemon
1 Tbsp EVOO
3-4 Tbsp water
salt to taste
1/2 cup toasted pine nuts
2 garlic cloves
juice of half a lemon
1 Tbsp EVOO
3-4 Tbsp water
salt to taste
Whirl those in the food processor until you get your gorgeous, emerald, creamy pesto!
The pesto sauce is one of my favorite was to top a pizza — it is SO bright and fresh. It pairs so beautifully with the savory, garlicy veggies.
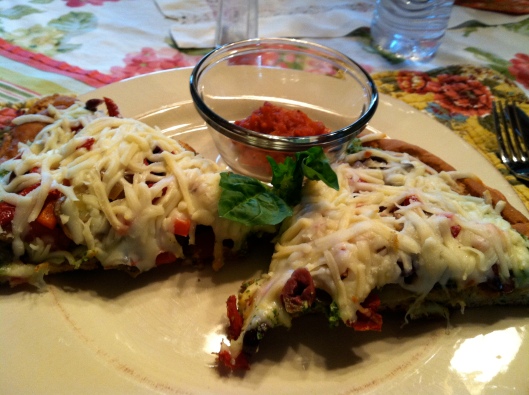
My parents topped their pizza with tomato sauce (I can’t have tomatoes on the Body Ecology Diet, and I’m allergic), my sautéed veggies, and LOTS of mozzarella cheese! I must say, all that gooey cheese made my mouth water!
This meal was great! The crust was so “out of the box!” Now, it’s not your “pick up and eat” type of slice — it’s definitely a “fork-and-knifer.” The outside crust did get very crisp and crunchy — and you could pick it up! But the center was soft yet firm. The flavor was great — it was almost sweet because of the hazelnuts! It was a great change of pace.
Now I’m not saying that ((B.E.D. aside)) given the choice between a great GF slice, and a cauliflower crust slice I’d go for the latter. But, given my dietary prison situation right now, I was grateful for a comforting slice pizza, graciously provided by cauliflower:)
And finally — Homemade Mustard!
Now you may be wondering why I tackled such an odd condiment. Well, on the Body Ecology Diet, the only vinegar you’re allowed to have is Raw Apple Cider Vinegar. (All others create a favorable environment for yeast). As a result, all prepared condiments are off limits because they’re made with red wine vinegar, balsamic vinegar, etc., or contain SUGAR. Soooo, I made my own mustard!
And it is REALLY good. Like, my mom said if I sold this in a gourmet store, it would go for about 8 bucks.
Here’s what you need:
1/2 cup mustard seeds
3/4 cup apple cider vinegar
1/3 cup water
2 drops pure stevia extract
1 tsp sea salt
3/4 tsp allspice
3/4 tps tumeric
3/4 cup apple cider vinegar
1/3 cup water
2 drops pure stevia extract
1 tsp sea salt
3/4 tsp allspice
3/4 tps tumeric
In an airtight container (like a mason jar), soak the mustard seeds in the vinegar and water for 2 days. Then, add your stevia, salt, and spices, and blend until you get your desired consistency. I used a Magic Bullet, and blended for about 15 seconds – it gets thicker the more you blend.
It definitely packs a spicy punch! But it is SO fantastic! And I love the whole “grain” texture! I like eating it with millet crackers, with veggies, and stirred into my zesty spinach! You can also make a salad dressing out of it by thinning it with a little olive oil, honey, and water!
Let’s make it a great week!
FOOD PROCESSOR ALERT!! My handy dandy food processor was the muscle behind this pesto. Also, I got to use my cute little Magic Bullet when I made my mustard. I love this little gadget. It's perfect for making smoothies or sauces or...mustard! It's so convenient and easy to use. Here's where you can find one:
The BEST GF Pesto Pizza & a CPB Krispie Bar!
Pizza is one of those foods that bring people together :) Super Bowl Parties, Friday Movie Nights, Birthday Parties, Bowling Nights, Elementary School Clean Classroom Winner Parties (remember the bribery?!), Poker Nights, Oscar Parties….the list goes on and on. Well, lets add to that list — because this AMAZING gluten and dairy free pizza brings both GF-ers, and non-GF-ers together with its fantastic crust!
Well let me just say, this crust did not taste gluten free. The texture, the flavor, the crunchiness and chewiness made this crust 100% delicious. I will go so far as to declare that I am no longer looking for a crust recipe — this is my #1. The outside of the crust was that crunchy, golden texture that everyone loves. Then the center maintained that crisp-chewiness. It was not at all dense, crumbly, cakey, or sandy like most GF crusts. Just good.
I’ve made this delectable pizza before, but I’ll refresh your memory!
It was pretty easy to make…in fact, this was more like making a quick bread batter than dough.
This makes enough for one medium-ish pizza–it fed 3 people. If you’re feeding 4, you’ll definitely want to double the recipe and make 2 pies. We made ours in a stand mixer, but a hand mixer would work just fine. Here’s what you’ll need.
1 cup tapioca flour
1/2 cup sorghum flour
1/4 cup brown rice flour
1/4 cup GF AP flour mix (I used Bob’s Mill)
1 1/2 tsp baking powder
1 tsp xanthan gum
1/2 tsp sea salt
1 1/2 Tbsp light brown sugar
1 cup warm water (not boiling, but warm)
good pinch of sugar
3/4 tsp active dry yeast
1 Tbsp olive oil (You can use 2 Tbsp, but my tummy only likes 1)
1 beaten egg
1/8 tsp apple cider vinegar
Here’s what you do: Preheat oven to 400 degrees. Add all the dry ingredients and sugar to your mixer and mix them all together. (Use a hand whisk to make sure they are well incorporated). Then proof your yeast in 1 cup of warm water with a good pinch of sugar. It will foam–let it sit for about 10 minutes. While the yeast sits, combine your beaten egg, oil, and vinegar in a separate bowl. Then, with your mixer on low, slowly pour in your yeast water, and egg mixture. Beat for about a minute on medium until it becomes smooth and batter-like.
Then, pour your batter onto a parchment-paper-sprayed-with-olive-oil lined pizza pan. (That was a mouthful!) Using a silicone spatula, spread it out until it is nice and thin. Then, let that sit by the oven for about 15 minutes.
Bake it for 10 minutes, then take it out, spray it with EVOO, and return it to the oven for another 15 minutes until it is golden — keep your eye on it! You now have the most amazing pizza crust to top with whatever your heart desires! Put your toppings on and pop it back in the oven until the cheese melts.
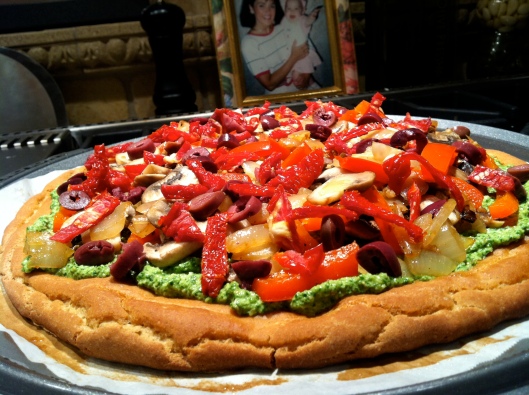
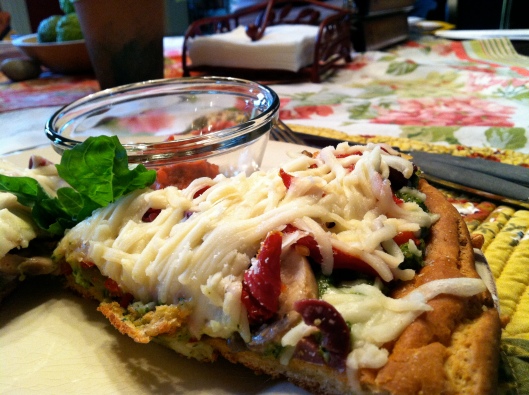
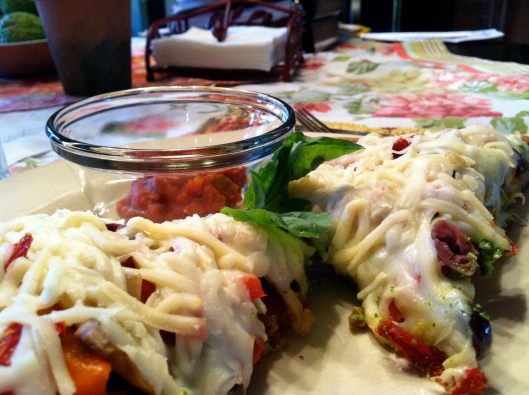
Here’s how I topped it — WITH VEGAN PESTO!
1 cup fresh basil
1/2 cup toasted pine nuts
2 garlic cloves
juice of half a lemon
1 Tbsp EVOO
3-4 Tbsp water
salt to taste
1/2 cup toasted pine nuts
2 garlic cloves
juice of half a lemon
1 Tbsp EVOO
3-4 Tbsp water
salt to taste
Whirl those in the food processor until you get your gorgeous, emerald, creamy pesto!
So the pizza had a pesto sauce instead of a red sauce. This was the absolute correct decision. Then I topped it with:
1 onion, 6 sliced mushrooms, 1 red pepper — all sautéed together with 1 tsp EVOO, 2 grated garlic cloves, S & P.
sliced kalamata olives, chopped sun-dried tomatoes
Veggie Shreds Mozzarella Style Vegan Cheese
Oh. My. Gosh. This was AMAZING! The crust texture was phenomenal: crunchy but a little chewy, and sturdy enough to hold the toppings! The pesto was packed with fantastic basil and garlic flavor — so bright and lovely! The olives were salty, while the sun-dried tomatoes were intensely sweet. The mushrooms were earthy, while the red peppers were sweet and crunchy. All combined to pizza perfection :)
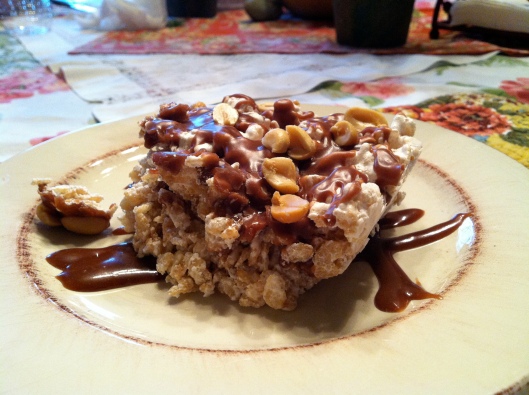
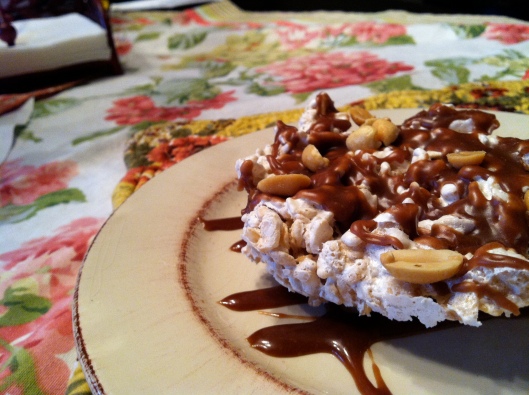
Finally, I rounded out the meal with CPB Krispie Bars! CPB, for those of you who aren’t as obsessed as myself, stands for Chocolate Peanut Butter! This is my go-to dessert flavor combo. These bars weren’t outstanding…they were just ok. They tasted great, but the texture was lacking….welcome to the world of GF experimentation!
I beat 2 egg whites with 1/4 tsp Cream of Tartar and 1/4 cup sugar until they formed stiff peaks. Then, I sifted in 1 cup of powdered sugar and 4 cups of Rice Krispies cereal. I put it in an olive-oil-sprayed baking dish and baked it for 15 minutes at 325. I then drizzled a mixture of semi-sweet, dairy-free chocolate chips, peanut butter, about 3/4 cup of powdered sugar, almond milk and vanilla extract. I warmed it in the microwave so I could melt and stir it, so it could drizzle.
These were just alright — the texture just didn’t blow me out of the water. What happened – I think – is that the very porous krispies absorbed a lot of the egg white mixture, making them very hard to chew. My jaw got a workout eating that bad boy!! I enjoyed it, but will probably stick with vegan marshmallows in the future!
Oh well, a tasty mistake! The pizza definitely made up for it!
Let this healthy and delicious pizza bring G and G-Free together!
To whip the egg whites for the krispie bar, I used my KitchenAid stand mixer. It is truly an amazing appliance. It makes whipping up the egg whites a breeze! And you can do so many different things with it! From make cookies to pasta dough! We just got my sister-in-law a kitchenaid with the pasta making attachment. You can find these amazing tools here:
Subscribe to:
Posts (Atom)


